Scenes Editor
In Open Peer Power 0.102 we introduced the first version of our scene editor. If you just created a new configuration with Open Peer Power, then you’re all set! Go to the UI and enjoy.
From the UI choose Configuration which is located in the sidebar, then click on Scenes to go to the scene editor. Press the + sign in the lower right corner to get started.
Choose a meaningful name for your scene.
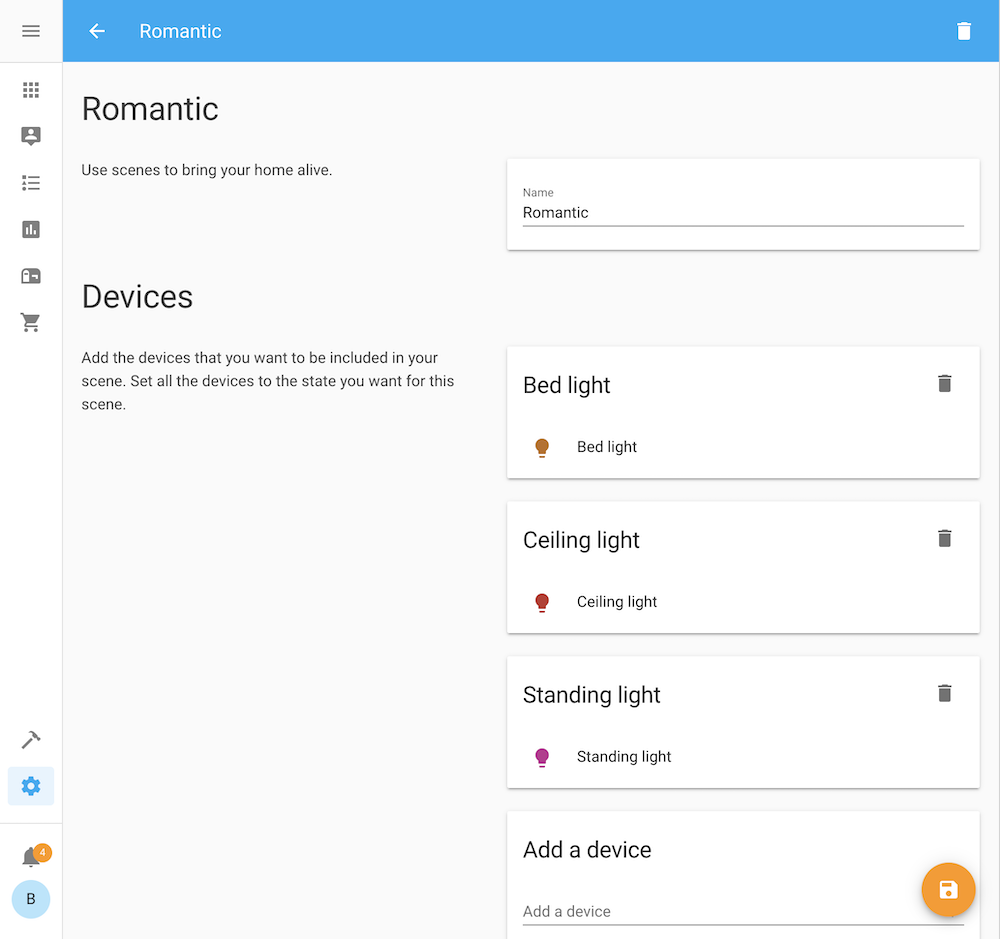
Select all the devices (and/or entities when in advanced mode) you want to include in your scene. The state of your devices will be saved, so it can be restored when you are finished creating your scene. Set the state of the devices to how you want them to be in your scene, this can be done by clicking on it and edit the state from the popup, or any other method that changes the state. On the moment you save the scene, all the states of your devices are stored in the scene. When you leave the editor the states of the devices are restored to the state from before you started editing.
Updating your configuration to use the editor
First, check that you have activated the configuration editor.
# Activate the configuration editor
config:
The scene editor reads and writes to the file scenes.yaml in the root of your configuration folder.
Currently, both the name of this file and its location are fixed.
Make sure that you have set up the scene integration to read from it:
# Configuration.yaml example
scene: !include scenes.yaml
If you still want to use your old scene section, add a label to the old entry:
scene old:
  - name: ...
You can use the scene: and scene old: sections at the same time:
scene old:to keep your manual designed scenesscene:to save the scene created by the online editor
scene: !include scenes.yaml
scene old: !include_dir_merge_list scenes
Migrating your scenes to scenes.yaml
If you want to migrate your old scenes to use the editor, you’ll have to copy them to scenes.yaml. Make sure that scenes.yaml remains a list! For each scene that you copy over, you’ll have to add an id. This can be any string as long as it’s unique.
For example:
# Example scenes.yaml entry
- id: my_unique_id # <-- Required for editor to work.
  name: Romantic
  entities:
    light.tv_back_light: on
    light.ceiling:
      state: on
      xy_color: [0.33, 0.66]
      brightness: 200