Automation Editor
In Open Peer Power 0.45 we introduced the first version of our automation editor. If you just created a new configuration with Open Peer Power, then you’re all set! Go to the UI and enjoy.
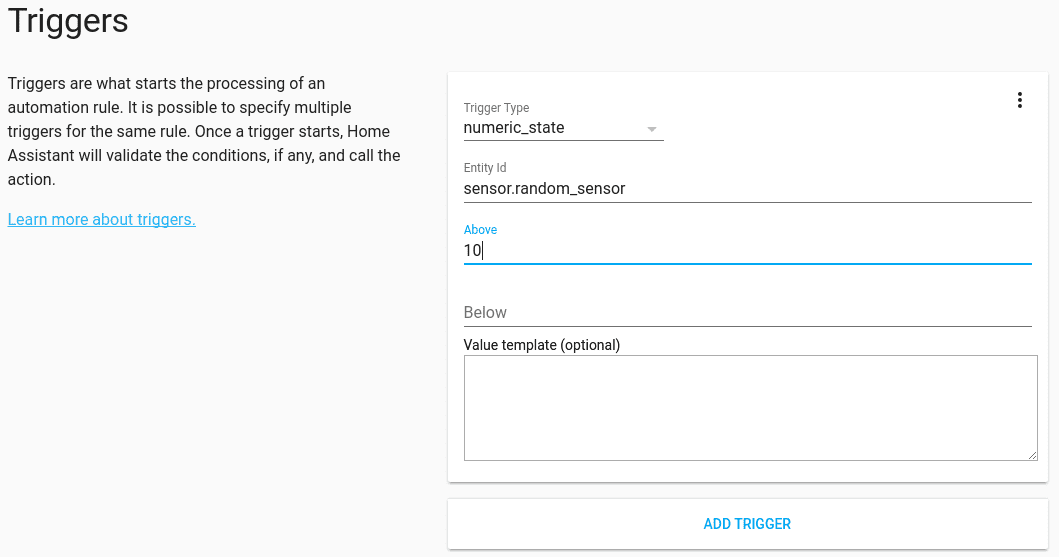
From the UI choose Configuration which is located in the sidebar, then click on Automation to go to the automation editor. Press the + sign in the lower right corner to get started. This example is based on the manual steps described in the Getting started section for a random sensor.
Choose a meaningful name for your automation rules.

If the value of the sensor is greater than 10, then the automation rule should apply.
Firing a persistent notification is the result.
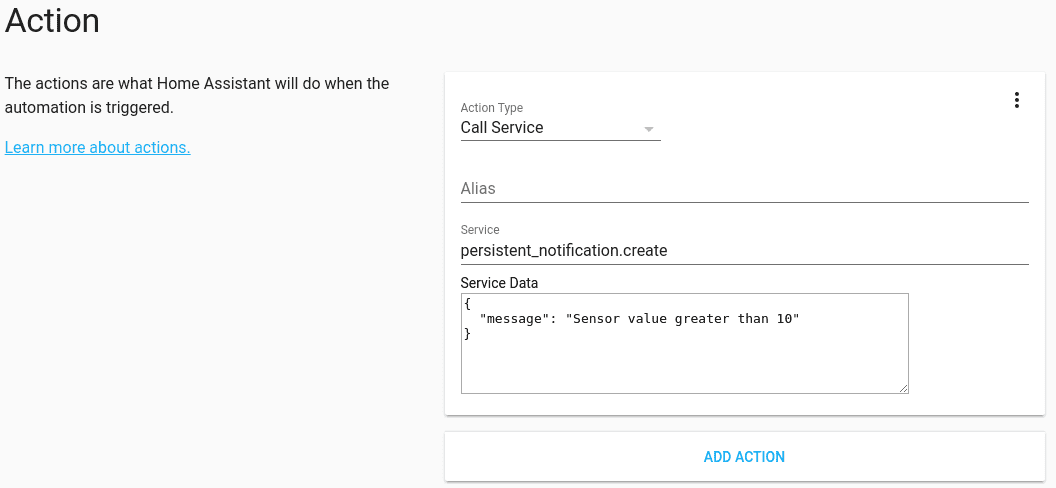
As “Service Data” we want a simple text that is shown as part of the notification.
{
  "message": "Sensor value greater than 10"
}
Don’t forget to save your new automation rule. For your saved automation rule to come into effect, you will need to go to the Configuration page and click on Reload Automation.
Updating your configuration to use the editor
First, check that you have activated the configuration editor.
# Activate the configuration editor
config:
The automation editor reads and writes to the file automations.yaml in the root of your configuration folder.
Currently, both the name of this file and its location are fixed.
Make sure that you have set up the automation integration to read from it:
# Configuration.yaml example
automation: !include automations.yaml
If you still want to use your old automation section, add a label to the old entry:
automation old:
- trigger:
    platform: ...
You can use the automation: and automation old: sections at the same time:
automation old:to keep your manual designed automationsautomation:to save the automation created by the online editor
automation: !include automations.yaml
automation old: !include_dir_merge_list automations
Migrating your automations to automations.yaml
If you want to migrate your old automations to use the editor, you’ll have to copy them to automations.yaml. Make sure that automations.yaml remains a list! For each automation that you copy over, you’ll have to add an id. This can be any string as long as it’s unique.
For example, the below automation will be triggered when the sun goes from below the horizon to above the horizon. Then, if the temperature is between 17 and 25 degrees, a light will be turned on.
# Example automations.yaml entry
- id: my_unique_id  # <-- Required for editor to work, for automations created with the editor the id will be automatically generated.
  alias: Hello world
  trigger:
  - platform: state
    entity_id: sun.sun
    from: below_horizon
    to: above_horizon
  condition:
  - condition: numeric_state
    entity_id: sensor.temperature
    above: 17
    below: 25
    value_template: '{{ float(state.state) + 2 }}'
  action:
  - service: light.turn_on